How To Compare Options For A Renter Friendly Bathroom Refresh Without Permanent Changes
A practical step-by-step guide to how to compare options for a renter-friendly bathroom refresh without permanent changes, including preparation, instructions, common issues, tips, and next steps.
How To Compare Options For A Renter Friendly Bathroom Refresh Without Permanent Changes
Renovating a bathroom in a rental apartment usually requires landlord approval and often results in losing your security deposit. However, you can refresh the space with temporary, damage-free solutions that come out cleanly later. This guide compares peel-and-stick tiles, removable wallpaper, temporary countertop covers, and other no-permanent-change options. You'll learn how to evaluate adhesion strength, moisture resistance, surface compatibility, and removal ease. We'll walk you through measuring, surface prep, application, daily use, and final removal. With careful comparison, you can enjoy a beautiful bathroom without risking your deposit or breaking lease rules.
Fast Answer
- Compare options by sticky residue risk, moisture resistance, and surface damage potential. Use removable adhesive products, tension rods, and temporary covers that leave no marks.
- Avoid permanent adhesives, screws, and drilling. Stick to peel-and-stick products, suction mounts, and clamp-on fixtures. Always test in a hidden spot first.
Before You Start
- Measure your bathroom walls, floor, and countertop accurately in centimeters and millimeters. Note any uneven surfaces, textured paint, or existing damage like chips or stains.
- Clean all surfaces with a mild cleaner and let them dry fully. Degrease areas near the sink and shower, as residue prevents adhesion.
- Take photos of the current bathroom and make a list of landlord rules regarding paint, fixtures, and wall hangings. Check your lease for clauses about alterations.
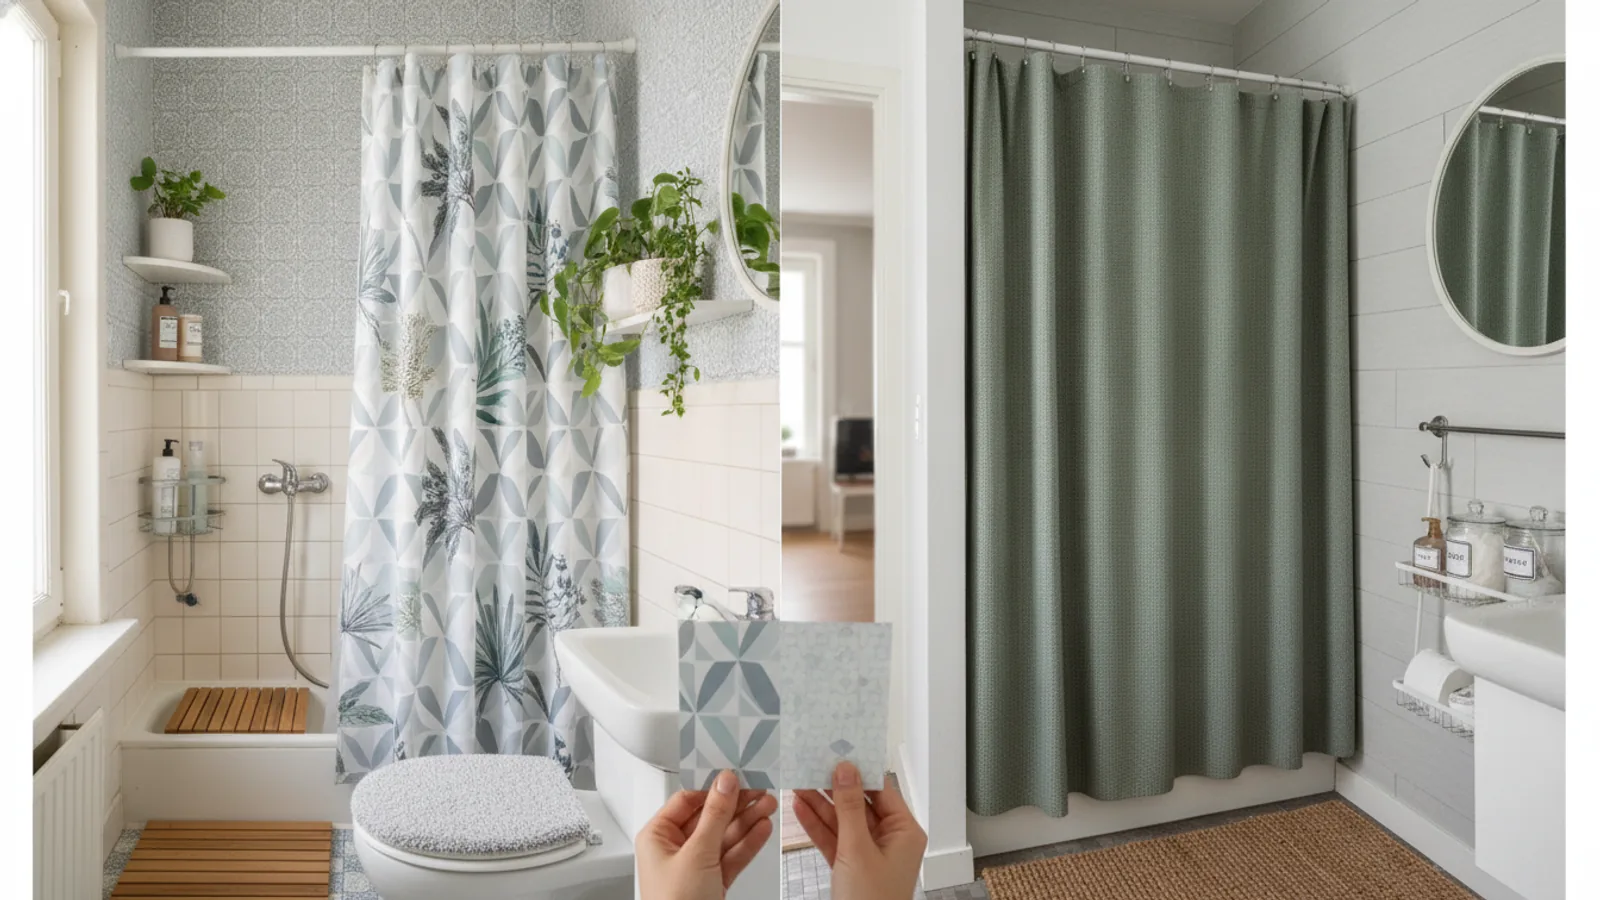
- Gather samples of peel-and-stick tiles, removable wallpaper, and hook strips. Keep a small patch test in a closet or behind the door for at least 48 hours.
Step-by-Step Instructions
List your must-have refresh areas in order
Start by writing down which parts of the bathroom bother you most: the wall color, cabinet fronts, floor, or shower surround. For each area, note the surface material (paint, laminate, ceramic, glass) and its texture. Rank them from most to least visible, because you'll probably want to spend your budget on the most noticeable spots. Next, think about how long you plan to stay—if it's less than a year, choose easily removable options; if you expect to move in a few months, prioritize low-cost and low-effort changes. Also consider whether you need landlord permission for any change, even temporary ones. Make a list of your top three areas, and write down the exact size of each. For example, measure the wall area you want to cover, the width and depth of the floor, and the countertop dimensions. Having these numbers will help you compare product sizes and avoid buying too little or too much. You should also check for any existing damage like peeling paint or loose tiles, because these will affect adhesion. Finally, decide on a style or color scheme that matches your existing fixtures, making your refresh feel cohesive.
Research removal ease and residue risk for each product
For each candidate product—peel-and-stick tiles, temporary wallpaper, vinyl film, contact paper, or magnetic panels—check the manufacturer's instructions for removal. Look for phrases like 'peels off cleanly' or 'leaves no residue,' but don't trust marketing claims. Instead, read user reviews that describe actual removal after months of use. Pay special attention to how the product reacts to humidity: some adhesives soften and stick harder. Compare the adhesive strength: strong adhesives might hold well but tear paint; weaker ones may fall off. A good rule is that if a product is advertised as 'permanent' you should avoid it unless you plan to leave it forever. For temporary options, look for those that specify 'removable' or 'repositionable' in the technical specs. Another factor is surface type: some adhesives stick well to smooth surfaces like glass or glossy paint, but fail on textured surfaces or matte paint. Write down the removal instructions for each product and note if they require heat, such as using a blow dryer, or special solution. Also check if the product can be reused or if it loses stickiness once removed. Finally, do a patch test on a corner that is hidden, like behind the toilet or inside a cabinet, and try removing it after 48 hours to see how it behaves.
Evaluate moisture resistance for each material
Bathrooms are humid, so you must assess how each material handles moisture and splashes. Look for product specifications that mention 'water-resistant' or 'moisture-proof.' Peel-and-stick vinyl tiles are usually water-resistant, but their edges can lift if water seeps underneath. Removable wallpaper might be washable or water-resistant, but soakable paper can bubble or peel. For surfaces near the shower or sink, choose a product with a protective layer, such as a vinyl coating. Check if the adhesive is water-sensitive: some acrylic adhesives weaken when wet, causing tiles to slip. Also consider the substrate: if you have a wooden vanity, moisture can warp it, but contact paper with a plastic coating can protect it. A practical test is to place a small sample piece on a tray with a few drops of water and leave it overnight. Then check if the color bleeds or the adhesive dissolves. Also, think about steam: a poorly vented bathroom can cause moisture to condense on walls, and some adhesives might fail. Make sure you inspect the product's removal instructions for water and humidity warnings. If you're placing a floor mat, ensure that water won't get trapped between the mat and the floor for long periods, which can cause stains or mold.
Choose backing materials that protect the original surface
The backing is the layer between your temporary cover and the original surface. A protective backing can prevent adhesive damage and make removal easier. For example, you can use plastic sheets or a clear film under peel-and-stick items to keep them from touching the paint. There are also specialty backings like 'renter-friendly wallpaper' that have a non-adhesive border or a static cling. Another idea is to use magnetic sheets if you have metal cabinet doors, or tension rods for curtains instead of adhesive hooks. For floors, you can use a rug pad or a rubber mat under a peel-and-stick floor to avoid sticky residue. When comparing products, check what backing materials are compatible. You might need to pair a product with an additional clear film or a bonding primer that is specifically designed for rentals. However, never apply anything that is not easily removable. The backing should also be moisture-resistant, and it should not react chemically with the surface. For instance, some plastic films can cause paint to bubble over time. Ensure that the backing is smooth and even to prevent lumps. Finally, test the backing product on an inconspicuous area and see if it leaves any mark after a week.
Apply patches in hidden spots and test for a week
Before committing to a full installation, test each product in a hidden area such as inside a cabinet, behind the toilet, or on a high wall section. Clean the spot thoroughly, then apply a sample piece according to the instructions. Wait at least seven days, including a few days with hot showers to simulate humidity. After the week, inspect for signs of lifting, peeling, or staining. Then carefully remove the sample to see if it peels off without residue. If it leaves any mark or if the adhesive becomes sticky, discard that product. Also test how the product responds to cleaning: wipe it with a damp cloth and a mild cleaner to see if the color fades or the print smears. This test is important because your bathroom will get daily use. Also, consider checking how the product handles high temperatures if you have a heater or hot pipes nearby. You might also want to test the product on the specific surface you intend to cover, since a patch on drywall won't behave the same as on tile. Take notes and photos during the test so you can compare. After testing, choose only the products that pass all your criteria.
Compare total cost and effort for each option
After narrowing down to a few viable products, compare the total cost and effort involved. Calculate the cost per square meter or per roll, then multiply by the area you measured. Don't forget to factor in any extra materials like adhesive sprays, edge sealing tape, or tools such as a smoother and a utility knife. Also, consider the labor time: peel-and-stick tiles require alignments and cutting, while wallpaper needs precise placement and bubble smoothing. Some temporary floor mats might be simply laid down, but tapes and Velcro strips need extra time. Effort also includes cleanup: products that require solvents for removal will take more time and may increase risk of damage. Compare the longevity: a slightly more expensive product that lasts for two years might be worth it if you plan to stay that long. Look for deals or discounts, but avoid cheap products that fail quickly. To compare properly, create a simple table with columns for price per unit, estimated installation time, removal time, and residue risk. Also, think about the difficulty of patching walls if something goes wrong. If you are not handy, choose simpler options like fabric covers or adhesive hooks that don't require cutting. Always keep your budget in mind, but remember that 'cheap' can become expensive if you need to repair damage.
Quick Reference
| Situation | Action | Why it helps |
|---|---|---|
| You want to change wall color without painting. | Measure the wall, then order peel-and-stick temporary wallpaper that is labeled easily removable. Before applying, clean the wall and do a patch test behind a cabinet. | Removable wallpaper goes on directly and peels off without paint damage, giving you a new color without breaking your lease. |
| The bathroom floor is dated and stained. | Use peel-and-stick vinyl floor tiles designed for temporary use. Apply a protective backing like non-adhesive plastic film first, then lay the tiles over it, following the pattern. | A protective layer prevents adhesive residue from sticking to the original floor, and tiles can be lifted easily at move-out. |
| You need to hide an ugly countertop or backsplash. | Use contact paper specifically rated for removable use. Cut it slightly larger than the surface, apply it with a squeegee, and trim edges with a utility knife. Seal edges with clear tape. | Contact paper is affordable, removable, and mimics the look of stone or tile, but it works best on smooth, clean surfaces. |
Common Issues
- Peel-and-stick tiles start lifting at the edges due to moisture.: Wipe the edges and press them down firmly. Use a hair dryer on low heat to warm the adhesive and reseal the edges. Also, increase bathroom ventilation by using a fan during and after showers.
- Removable wallpaper leaves a sticky residue when you peel it off.: Gently heat the area with a blow dryer to soften the adhesive, then slowly pull the wallpaper at a 45-degree angle. If residue remains, remove it with a mixture of warm water and dish soap, or use a commercial residue remover, testing on an unseen area first.
- The temporary covering leaves a slight color stain or mark on the wall after removal.: Try using a melamine foam eraser on non-painted surfaces, but on painted walls, you may need to touch up with a small amount of matching paint. To prevent future marks, always apply a protective layer like painter's tape behind the product.
Advanced Tips
- For maximum removal ease, apply a layer of clear plastic wrap or painter's tape to the surface before sticking any temporary adhesive product, but only if the product still adheres properly.
- Use a seam roller to press down all edges of peel-and-stick tiles and wallpaper to ensure a tight seal that prevents moisture from getting underneath.
- Consider using tension-mounted shower rods and clip-on curtain rings to hang fabric accents, avoiding any adhesive or hardware on walls.
Final Checklist
- Checked all permanent changes with landlord and documented in writing.
- Tested every product on a hidden spot and waited a week before full install.
- Purchased extra material for cutting mistakes and kept receipts in case of returns.
- Cleaned the bathroom surfaces thoroughly and allowed them to dry completely.
FAQ
What is the safest temporary option for rental bathroom walls?
The safest choice is a peel-and-stick temporary wallpaper that explicitly says it is removable and damage-free. Always test it on a hidden wall area for at least a week, and use a protective layer like painter's tape if the wall is delicate. Avoid heavy textures and make sure the wall is clean and dry.
Can I use regular contact paper for bathroom surfaces?
Yes, but only if it is labeled removable and is water-resistant. Test it first because some contact papers leave a strong adhesive residue or are not durable in humidity. Use it on smooth, sealed surfaces, and avoid areas that get direct contact with water for long periods.
How do I remove temporary floor tiles without damaging the floor?
First, gently lift a corner and pry slowly with a putty knife, using a heat gun on low to soften the adhesive if needed. If there is residue, apply a mixture of baking soda and water and scrub gently. Always lift with the manufacturer's removal instructions, and wait for the adhesive to warm up on a warm day.