A Practical Guide To A Renter Friendly Bathroom Refresh Without Permanent Changes
A practical step-by-step guide to a practical guide to a renter-friendly bathroom refresh without permanent changes, including preparation, instructions, common issues, tips, and next steps.
A Practical Guide To A Renter Friendly Bathroom Refresh Without Permanent Changes
This guide offers a practical, step-by-step approach to refreshing a rental bathroom without making permanent changes. It focuses on temporary, damage-free upgrades that enhance style and functionality while protecting your security deposit. From deep cleaning to peel-and-stick tiles and removable fixtures, you'll learn how to transform your space with confidence.
Fast Answer
- Focus on temporary, non-damaging upgrades like peel-and-stick tiles, removable hooks, and improved lighting to refresh your bathroom without risking your deposit.
- Deep clean and declutter first, then add a fresh shower curtain, new towels, and temporary storage solutions to create a spa-like feel in hours.
Before You Start
- Gather tools like a putty knife, rubbing alcohol, measuring tape, and a level. These help with clean removal and precise placement of temporary items.
- Photograph the original bathroom condition to document any existing damage. This protects you when moving out and helps you restore the space.
- Identify the finish of your walls, tiles, and fixtures. Different surfaces require specific adhesives that won't leave residue or cause damage.
- Set a budget and timeline. Prioritize high-impact, low-cost items like a new shower curtain, bath mat, and storage caddies.
Step-by-Step Instructions
Step 1: Deep Clean Every Surface
Begin with a thorough cleaning to remove soap scum, hard water stains, and grime. Use a bathroom cleaner suitable for your surfaces, and pay special attention to the shower, sink, and toilet. Scrub with a non-abrasive sponge to avoid scratching finishes. Rinse well and dry all surfaces completely. This creates a clean base for any temporary adhesives and makes the entire space feel refreshed instantly. A clean bathroom also reduces the risk of mold and mildew, which can damage surfaces and cause health issues. As you clean, note any existing damage such as cracks or peeling paint. This will help you document the condition and avoid being blamed for pre-existing issues. After cleaning, you'll have a fresh canvas for your updates and a healthier environment. This step is essential because adhesive products won't stick well to dirty or greasy surfaces, leading to potential failures and residue problems later.
Step 2: Declutter and Organize
Remove all items from counters, shelves, and storage areas. Sort them into keep, relocate, and discard piles. Be ruthless: if you haven't used it in months, you probably don't need it. Limit counter items to daily essentials. Use a tray to corral items like toothbrush holders and soap dispensers. Add temporary storage like an over-the-toilet shelf or a tension rod with baskets. This instantly creates a more open, serene space. A clutter-free bathroom is easier to clean and feels more spacious. When you add new temporary organizers, measure your space first to ensure they fit. Group similar items together for easy access and a pleasing aesthetic. A simple organization system can transform the look of your bathroom without any permanent changes. It also reduces visual chaos, making the room feel calmer and more inviting. This step is important because clutter attracts grime and makes the space feel smaller, but organized storage protects your items and simplifies daily routines.
Step 3: Refresh the Walls and Tiles
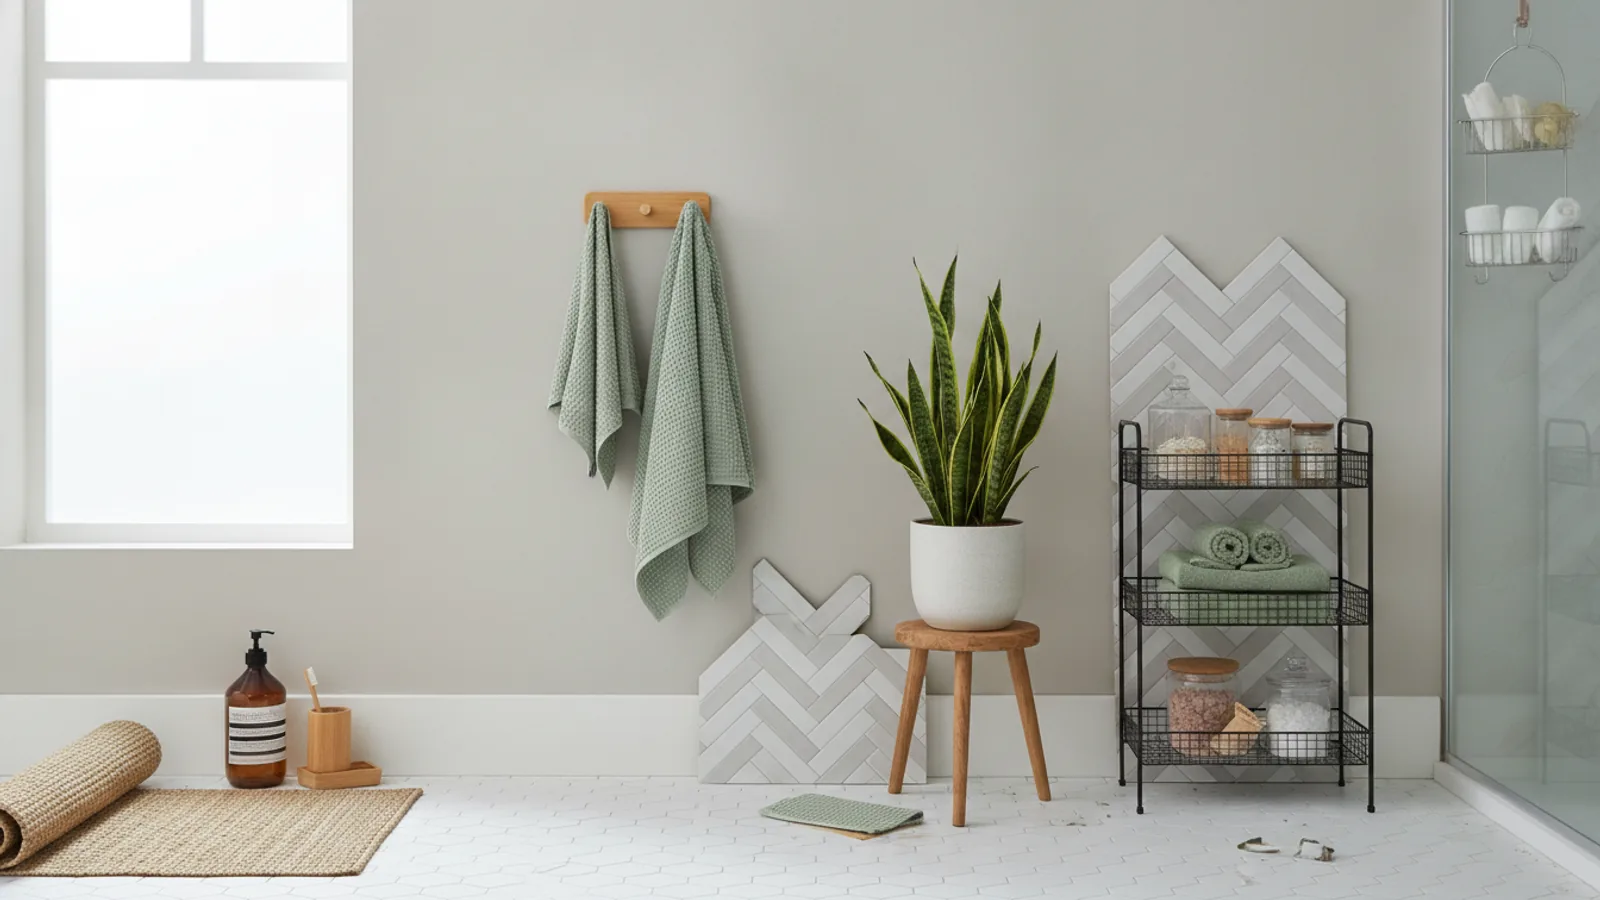
For the walls, consider using peel-and-stick wallpaper or tile stickers to cover dated tiles or plain drywall. Clean the surface with rubbing alcohol and let it dry completely before application. Measure accurately and cut panels with a utility knife. Start from a corner and smooth out air bubbles with a squeegee, working from the center outward. For tile stickers, align the sheets carefully to maintain a straight pattern. Ensure the product is removable and test a small section first to confirm it won't damage the paint. This update gives a dramatic new look without permanent commitment. When you remove them, gentle heat from a hairdryer can help release the adhesive. These products are designed to be temporary but can last for years if applied correctly. They are a safe way to change the color and pattern of your bathroom surfaces. This is a crucial step because it provides the most visual impact and can completely transform the bathroom's style.
Step 4: Upgrade the Shower Curtain and Rod
Replace your old shower curtain with a new one in a pattern or color that complements your new theme. Choose a fabric liner that is washable and mildew-resistant. Swap out the curved shower rod for a tension rod that requires no drilling. These rods are adjustable and can be installed without tools, holding heavy curtains securely. If your current rod is fixed, you can still replace the hooks and curtain rings for a fresh look. Hang the curtain so it falls below the rim of the tub or shower pan to prevent water from splashing out. This simple change instantly brightens the room and can hide less attractive areas. Ensure the rod is placed at the correct height for optimal coverage. A new shower curtain can set the tone for the entire bathroom and is one of the most affordable updates. It also protects your shower area from moisture, reducing the risk of mold and damage.
Step 5: Add Temporary Storage and Accessories
Incorporate freestanding shelves, over-the-toilet storage, or rolling carts to increase functionality. Use removable adhesive hooks, suction cup baskets, or command strips to hang towels, loofahs, and small items. Place a small tray or dish on the sink to hold everyday items like soap and lotion. Add a new bath mat and a set of matching towels to tie the room together. Use a wooden or acrylic ladder as a towel rack or decorative shelf. These items are portable and can be taken with you when you move, making them smart investments. Ensure all hooks and shelves are installed according to the manufacturer's instructions to avoid damage. This step is vital because extra storage reduces clutter and provides convenient access to essentials, making the bathroom more functional and enjoyable.
Step 6: Enhance Lighting and Ambiance
Improve the bathroom's lighting by replacing the existing light bulb with a brighter, warmer LED bulb if the fixture allows. Clean the light fixture to remove dust and grime. Add a battery-operated motion sensor light to dim corners or near the mirror. Use a small lamp on the counter or a wall-mounted battery light for extra illumination. Consider adding a dimmer switch if you have the permission, but otherwise use lamps with adjustable brightness. Good lighting makes the space feel larger and more welcoming. It also helps you see clearly for grooming tasks. You can add a small vase with fresh flowers or a scented reed diffuser to enhance the ambiance. Soft lighting can create a spa-like atmosphere, promoting relaxation and comfort. This step is important because proper lighting is essential for daily tasks and can dramatically affect the mood and perceived size of the bathroom.
Quick Reference
| Situation | Action | Why it helps |
|---|---|---|
| You want to change the tile color without tiling. | Clean the tile thoroughly with rubbing alcohol, then apply peel-and-stick tile stickers, smoothing out bubbles as you go. | Peel-and-stick stickers are removable and damage-free, giving the look of new tile without permanent commitment. |
| You need extra storage but cannot drill holes. | Install a tension rod inside a shower or under a sink, then hang baskets or caddies from it to hold toiletries and supplies. | Tension rods require no drilling and are easy to install and remove, providing functional storage without damaging walls. |
| You want to make the room feel more spacious for a day. | Declutter all surfaces, place a large mirror opposite the window, and use a bright, cool light bulb. | Decluttering reduces visual noise, mirrors reflect natural light, and bright light opens up the space, making it feel larger. |
Common Issues
- Peel-and-stick tiles leave adhesive residue when removed.: Use a hairdryer to slightly heat the adhesive, then peel slowly. If residue remains, apply a bit of rubbing alcohol to a cloth and gently rub it until the residue comes off.
- Suction cup hooks fall off after a few days.: Clean surface with rubbing alcohol, let dry completely, then press the hook firmly and twist it to create a vacuum. Re-tighten periodically.
- Command strips damage the paint when removed.: When removing, press the strip horizontally and pull straight down. If some adhesive remains, roll it off using your fingers and then clean with rubbing alcohol or a magic eraser.
Advanced Tips
- Use decorative washi tape to frame a mirror or outline a niche for a colorful accent that's completely removable and won't leave marks.
- Try using a floor-length floor-length curtain as a stylish backdrop if you have a freestanding tub, hanging it from a tension rod to add drama without permanent changes.
- Swap your regular faucet with a temporary rainfall faucet head that screws onto the existing pipe for a luxury shower experience, easy to remove.
Final Checklist
- Take photos of the original bathroom condition before starting and store them for move-out.
- Test all adhesive products in a small, hidden area before full application to ensure compatibility.
- Document the location and type of all temporary items you install for easy removal.
- Review your lease or ask your landlord about any restrictions on temporary changes.
FAQ
Will peel-and-stick tile damage my bathroom walls?
Generally, peel-and-stick tiles are designed to be removable without leaving residue if applied to clean, smooth surfaces. However, they can sometimes pull paint if the wall is in poor condition. Always test a small area first, and when removing, use gentle heat from a hairdryer to soften the adhesive, then peel slowly. If the paint does come off, you may need to touch it up, which could be a minor expense.
Can I change the showerhead in a rental?
Yes, you can usually swap out a standard showerhead with a new one because it simply screws onto the existing shower arm. This is considered a non-destructive change. Keep the original showerhead to reinstall before moving out. Make sure to use plumber's tape to avoid leaks and do not overtighten, as this could damage the plumbing.
How can I add storage without drilling holes?
You have many options: use over-the-door organizers, tension rods in alcoves, rolling carts, freestanding shelving units, and adhesive hooks or baskets. Suction cup shelves are great for glass surfaces like tile or mirrors. Ensure you clean the surface with rubbing alcohol before attaching any suction or adhesive items, and follow the product's weight limits to avoid accidents.